Loading...
Floating shelves have this particular kind of power in a small space. They add storage without taking up floor space, they give bare walls something worth looking at, and when they are done right, they make a room look like it was decorated by someone with a real eye for design rather than someone who spent a Sunday afternoon with a drill and a ten dollar pine board. The secret that most home decor accounts will not tell you outright is that the expensive-looking floating shelves you keep saving on Pinterest are often shockingly simple to build yourself. The difference between a shelf that looks like it came from a boutique home store and one that looks like a weekend project gone sideways almost always comes down to three things: the finish, the hardware, and how it is styled afterward. None of those things require a large budget. What they require is knowing which approach to take for the look you are after. These eight DIY floating shelf ideas cover everything from rustic wood planks with barely any prep to sleek box shelves that look genuinely architectural, and every single one of them can be built for a fraction of what you would pay in a store.
1. The Classic Pine Board Shelf with a Stained Finish
If you have never built a floating shelf before, a simple pine board with a stained finish is the perfect place to start. Pine is one of the most affordable woods available at any hardware store, and a single eight-foot board cut to your preferred lengths gives you everything you need for two or three shelves at a very low cost. The transformation happens in the staining process. A medium walnut or dark oak stain applied with a rag and wiped back slightly gives pine a warmth and richness that reads as a much more premium material than it actually is. Let it dry, follow up with a coat of matte or satin polyurethane, and the surface looks genuinely finished and intentional.
For the mounting hardware, invisible shelf brackets are widely available online for a few dollars each and create that clean floating look where no visible metal interrupts the wood surface. Mark your studs carefully, use a level, and take your time with the installation because a perfectly level shelf installed neatly makes everything placed on it look better. Style the finished shelves with a mix of practical items and a few decorative pieces, books stacked horizontally, a small trailing plant, a candle, a ceramic object, and the result looks like something out of a carefully curated home tour rather than a DIY project completed on a Saturday morning.

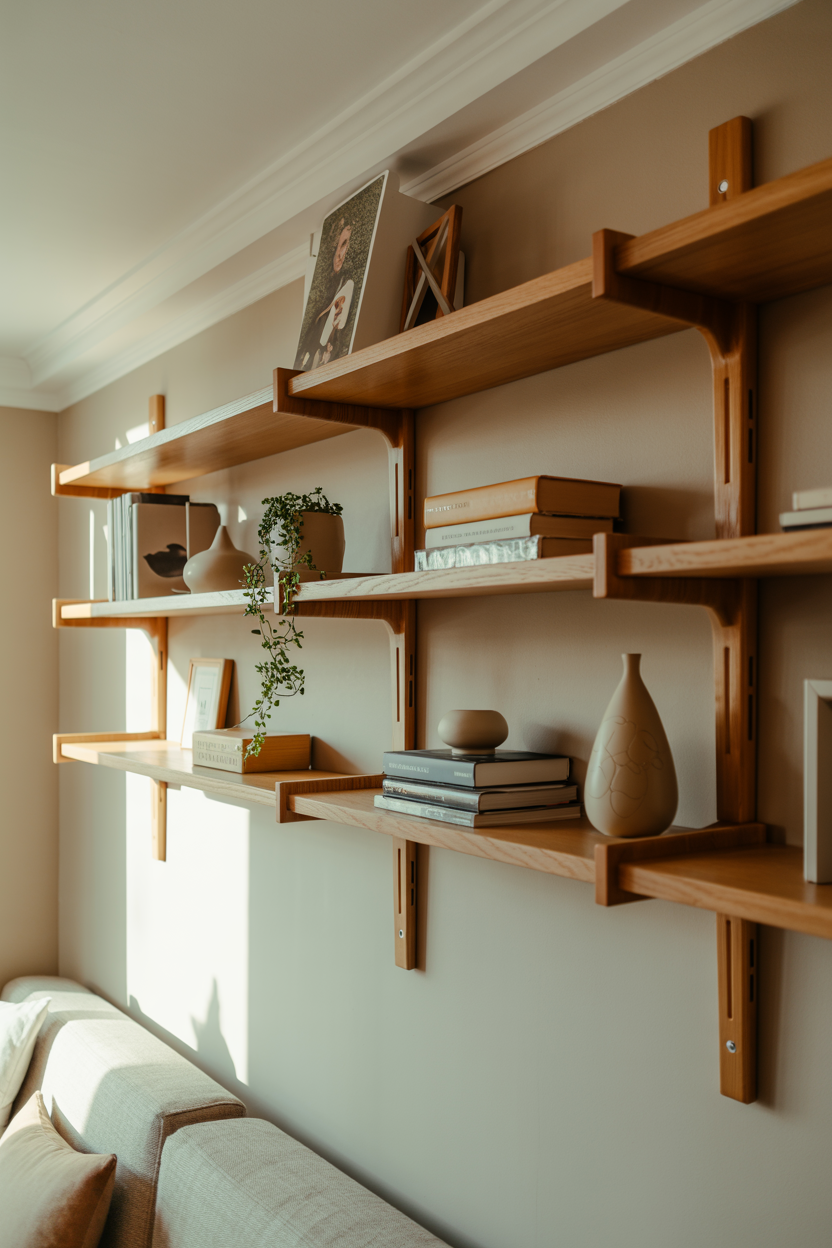
2. Dark Stained Box Shelves for a Moody, High-End Bedroom Look
Box shelves, sometimes called floating ledge shelves, have a thickness and depth to them that plain boards simply cannot replicate. They look architectural and deliberate, like something a designer specified rather than something you built. The good news is that building a basic box shelf requires only a few pieces of wood cut to size, some wood glue, a few finish nails, and a dark stain that does most of the heavy lifting aesthetically. The depth of the box, typically around four to five inches, creates a shadow line underneath the shelf that adds visual drama and makes the shelf look like it was installed by a professional.
In a bedroom, a set of dark stained box shelves on either side of the bed in place of traditional nightstands is one of the most transformative and space-efficient upgrades you can make. They hold everything a nightstand normally would, a lamp, a book, a glass of water, without occupying any floor space at all. The dark finish against a lighter wall creates contrast that photographs beautifully and adds that moody, cozy quality that makes a bedroom feel truly designed rather than furnished. The total material cost for a pair of these shelves typically lands well under thirty dollars, which makes it one of the highest-impact DIY projects available for a small bedroom on a tight budget.
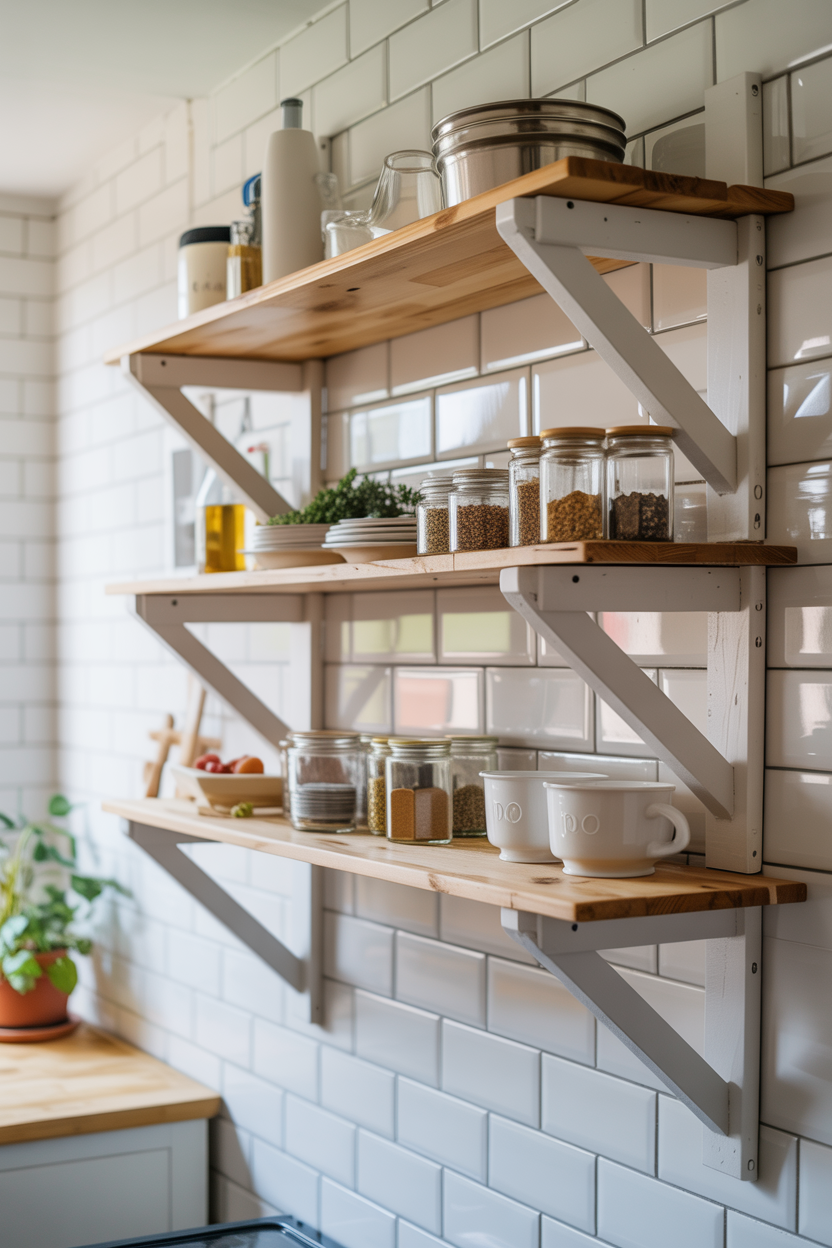
3. White Painted Shelves for a Clean, Bright Kitchen Upgrade
In a small kitchen where cabinet space is limited and counter space is precious, open floating shelves painted in a clean bright white are one of the most practical and visually satisfying upgrades you can make. They add storage for everyday items while keeping the kitchen feeling open and airy rather than cramped. The key to making white painted shelves look expensive rather than plain is in the paint finish and the edge treatment. Use a semi-gloss paint, which is both more durable in a kitchen environment and slightly more reflective in a way that looks more polished than flat paint. Lightly sand the edges before painting to soften them, and apply two thin coats rather than one thick one for a smooth, professional result.
Style kitchen floating shelves with a mix of function and display. Uniform glass jars filled with dry goods like pasta, rice, and lentils look organized and intentional. A small potted herb on one end, a stack of matching plates or bowls, and a couple of hooks screwed into the underside of a lower shelf for mugs all contribute to a setup that looks like it was pulled from a design blog but was assembled on a realistic budget. As of May 2026, the open kitchen shelf trend shows no signs of fading because it genuinely works in small spaces where every visual decision either adds to or subtracts from the sense of spaciousness.
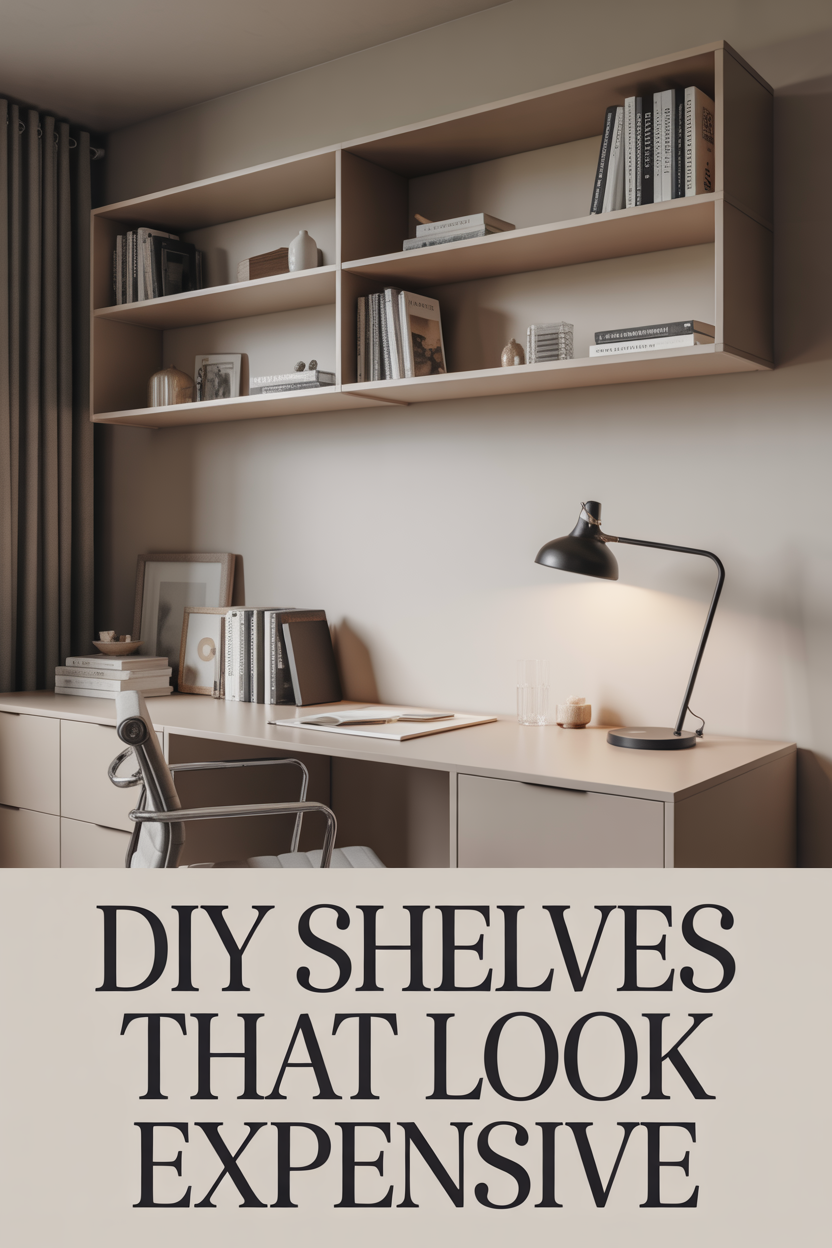
4. Minimalist Home Office Shelves with Invisible Brackets
A home office shelf setup that looks intentional and clean requires almost nothing beyond good wood, good brackets, and restraint in the styling. For a minimalist home office approach, choose a wood board in a light natural tone or paint it white, and mount it using rod-style invisible brackets that slide into holes drilled in the back of the shelf. When the shelf is on the wall, no hardware is visible at all, just a clean slab of wood appearing to float without any support. This look is widely available in expensive home stores for significant sums of money, but the DIY version using a basic board and a set of threaded rod brackets from a hardware store costs a small fraction of that.
Above a desk, two or three of these shelves staggered at different heights give you vertical storage for books, binders, a small plant, and a speaker or router without cluttering the desk surface below. The key to keeping it looking polished is limiting what goes on the shelves to items that are either genuinely useful or genuinely attractive, and ideally both. A row of identical small planters, a neat stack of notebooks in coordinating colors, or a set of matching storage boxes in a neutral tone all contribute to the kind of styled-but-functional look that makes a small home office feel like a real workspace rather than a makeshift setup.
5. Hairpin Leg Bracket Shelves for an Industrial Modern Look
Hairpin brackets are one of those small hardware details that punch well above their weight in terms of visual impact. Used as shelf supports instead of traditional flat brackets, they introduce an industrial, mid-century modern quality that makes even the most basic wood board look like a considered design choice. The combination of raw or lightly finished wood with thin metal hairpin brackets is one of the most reliably stylish shelf combinations available, and it works in almost any room from a living room to a bathroom to a small entryway. The brackets themselves are inexpensive and available in a range of metals including black, brass, and silver, so you can match them to other hardware in the room for a cohesive look.
For this style, a slightly rougher or more textured wood finish actually works in your favor. A board with visible grain, lightly sanded but not fully smoothed, with a single coat of natural or light oak stain lets the material speak for itself in a way that feels artisanal rather than unfinished. Mount the hairpin brackets directly into studs and they will hold a surprising amount of weight securely. Style the shelves with objects that echo the industrial aesthetic, a small geometric terrarium, a stack of design books, a concrete candle holder, and the whole wall comes together with a personality that feels collected and intentional.
6. Repurposed Wood Crate Shelves for a Rustic Boho Feel
Wood crates mounted sideways on a wall as floating shelves is one of those ideas that sounds too simple to look good until you actually see it done well. A set of matching wood crates, the kind available very cheaply at craft stores or online, painted or stained in a coordinating color and mounted flush to the wall creates a shelf arrangement with built-in sides that acts almost like a small cubby system. The enclosed edges give objects placed inside them a natural sense of containment, which makes styling them much easier since items look neat and framed rather than just sitting on an open surface.
For a boho or rustic bedroom or living room, leave the crates in their natural wood tone and add a simple coat of matte sealant to protect the surface. Arrange them in an asymmetric pattern on the wall, some horizontal and some vertical, for a layout that looks organic rather than rigid. Fill them with a trailing plant draping over one edge, a few rolled prints or canvases, a small lamp, and some books, and the result is a shelf arrangement with real character that cost almost nothing to build. This is also one of the easiest options on this list for people with limited DIY experience since it requires only the ability to drill into a stud and drive a few screws.
7. Bathroom Floating Shelves Made from Leftover Tile and Wood
Small bathrooms almost always suffer from a shortage of surface space, and a simple floating shelf installed above the toilet or beside the sink can solve that problem completely while adding a decorative element to what is often the most neglected room in the apartment. For a bathroom shelf that looks truly custom, consider pairing a wood board base with a tile surface. If you have any leftover tile from another project, or can pick up a few inexpensive tiles from a hardware store, adhering them to the top surface of a wood shelf before mounting it creates a finished, spa-like look that reads as genuinely high-end.
If tile feels too involved, a simple sealed wood shelf in a light tone works beautifully in a bathroom as long as it is properly sealed against moisture with a waterproof polyurethane or outdoor-grade finish. Keep the styling simple and consistent: matching soap dispensers, a small diffuser or candle, a folded hand towel, and a small succulent or air plant that handles humidity well. The restraint in styling is actually what makes bathroom shelves look expensive. A few well-chosen objects with space between them always reads better than a shelf packed to capacity, and in a small bathroom especially, that breathing room makes the whole room feel calmer and more intentional.
8. Picture Ledge Shelves for Art Display Without Putting Holes in Every Wall
Picture ledge shelves are among the easiest floating shelf styles to build and also among the most versatile in terms of where and how you use them. A picture ledge is essentially a very shallow shelf with a small lip at the front that prevents items from sliding off, designed specifically to hold framed prints, cards, small plants, and decorative objects at an angle. They are perfect for renters who want to display art without committing to hanging each frame individually, since a single ledge can hold multiple pieces that can be swapped out anytime without adding new holes to the wall.
Building a picture ledge requires only three pieces of wood: the flat shelf surface, a thin back piece to give it structure, and a small front lip piece. Cut them to length, glue and nail them together, sand everything smooth, and finish with paint or stain. The total material cost for a four-foot ledge is typically under ten dollars. Mount two or three of them at slightly different heights on a living room or bedroom wall, layer prints of different sizes along them, lean a small mirror against one, add a plant or two, and you have created a gallery wall effect that looks styled and dynamic but is completely flexible and renter-friendly. It is one of the most satisfying small space upgrades you can complete in an afternoon.
The best thing about DIY floating shelves is that you do not need to be particularly skilled or particularly well-funded to get results that genuinely look expensive. What you need is a clear idea of the finish you are after, a willingness to take your time with the preparation and the mounting, and a little patience when it comes to styling. Any one of these eight ideas can be completed over a weekend, and most of them cost less than a single store-bought shelf that would not look half as good in your specific space. Start with the style that fits your room best, gather your materials, and build something you will actually enjoy looking at every day. Save this article for your next project and share it with anyone who has been staring at an empty wall and wondering what to do with it.